How to Plan Your First Astro Tourism Trip
So here we are, sitting in our living room at 11 PM, laptop screens illuminating our faces like budget planetarium projectors, trying to figure out how the heck we plan our first proper astro tourism adventure. Turns out, there’s a whole lot more to chasing stars than just “pack a sleeping bag and point your face skyward.” Who knew?
After diving headfirst down the rabbit hole of dark sky reserves, moon phases, and telescope specifications (spoiler alert: we still can’t pronounce “astrophotography” without stumbling), we’ve compiled everything we’ve learned about planning your first astro tourism trip. Because honestly, if we can figure this out, so can you.

What Actually IS Astro Tourism (And Why We're Suddenly Obsessed)
Let’s start with the basics, because we certainly had to. Astro tourism is basically traveling specifically to see the night sky in all its unfiltered, light-pollution-free glory. We’re talking about those jaw-dropping photos of the Milky Way that make you question everything you thought you knew about our universe – except you’re seeing it with your actual eyeballs instead of through Instagram filters.
The trend has absolutely exploded in 2025 . With 62% of travelers planning stargazing trips and search terms like “dark sky holidays” increasing by 300% , it seems like everyone’s suddenly realized that maybe, just maybe, there’s more to the night sky than the three stars we can spot from our city balcony.
Plus, 2025 is apparently the year for this stuff – we’re hitting the peak of the sun’s 11-year solar cycle, which means more Northern Lights, better auroras, and basically Mother Nature putting on her best light show . Talk about perfect timing for our cosmic awakening.
Step 1: Choose Your Dark Sky Destination (AKA Where on Earth Can We Actually See Stars?)

Our Top Contenders for Dark Sky Destinations
Wood Buffalo National Park, Alberta/Northwest Territories, Canada
The claim to fame: World’s largest Dark Sky Preserve (44,807 square kilometers)
Why we’re tempted: It’s relatively close to home, and hello, Northern Lights central
Best time to visit: August-September for the Dark Sky Festival, or winter for clearest skies
The reality check: It’s remote. Like, really remote. But that’s kind of the point, right?
Jasper National Park, Alberta, Canada
The appeal: World’s second-largest Dark Sky Preserve but way more accessible
Perfect for: Us nervous first-timers who want amazing skies without total wilderness survival mode
Bonus points: Pyramid Lake and Maligne Lake for epic foreground shots
Aoraki Mackenzie Dark Sky Reserve, New Zealand
The draw: Southern Hemisphere constellations we’ve never seen
What makes it special: 4,367 square kilometers of some of the darkest skies on Earth
Our honest take: It’s on our “when we win the lottery” list because flights to New Zealand aren’t exactly budget-friendly
Atacama Desert, Chile
The wow factor: Often called the driest place on Earth = virtually no humidity or clouds
Why astronomers love it: Home to world-class observatories
Our consideration: May-September is dry season, perfect for our first attempt at star photography
Dark Sky Reserves Closer to Home (For Our Fellow North Americans)
Death Valley National Park, California/Nevada
The appeal: Extreme dryness and minimal light pollution
Practical note: November-March for comfortable temps (because apparently Death Valley is accurately named)
Big Bend National Park, Texas
The selling point: Part of a 9-million-acre binational dark sky region
What we love: Ranger-led stargazing programs (because we definitely need guidance)
Step 2: Timing is Everything (Moon Phases, Weather, and Cosmic Events)

Here’s where we learned that successful astro tourism is basically 50% planning and 50% hoping the weather gods are feeling generous.
Moon Phase Planning (The Make-or-Break Factor)
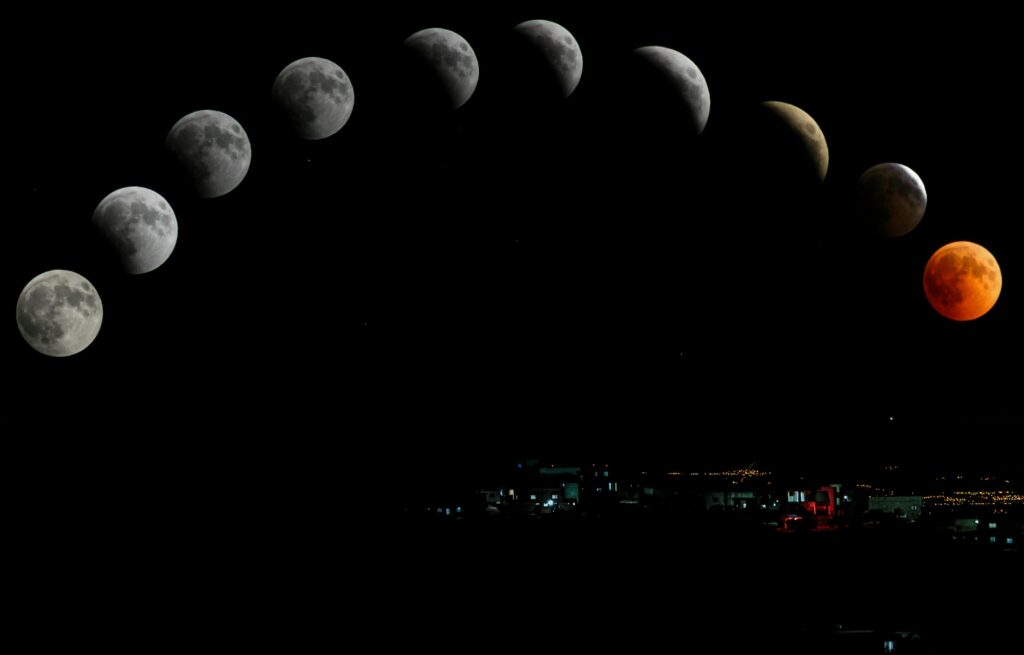
This was a game-changer for us to understand. The moon, as beautiful as it is, is basically the ultimate light pollution when you’re trying to see faint stars and galaxies .
New Moon = Our Best Friend
The moon is essentially invisible
Prime time for astrophotography and seeing the Milky Way
Perfect for meteor shower viewing
Quarter Moons = Compromise Territory
Some lunar light but still decent stargazing
Good for beginners who want a balance
Full Moon = Stargazing Nightmare
Rises at 6 PM, sets at 6 AM
Makes stargazing “all but impossible” according to astronomy experts
But hey, at least you can see where you’re walking without a flashlight
Pro Tip: We’ve bookmarked TimeandDate.com and downloaded the Stellarium app to track moon phases for our planned destinations. Game-changer.
Weather Windows and Seasonal Considerations
Best Overall Stargazing Season in Europe: May through September, especially during new moon phases
Clear Sky Essentials:
Low humidity (desert locations win here)
Minimal cloud cover
Stable atmospheric conditions
Avoid monsoon seasons in tropical destinations
Cosmic Events Worth Planning Around
2025’s Must-See Astronomical Events :
Four eclipses scheduled throughout the year
Peak solar maximum for enhanced aurora displays
Annual meteor showers (Perseids in August are apparently spectacular)
Step 3: Essential Gear (What We Actually Need vs. What We Think We Need)

Let’s be real – we started this planning process thinking we needed $10,000 worth of telescope equipment. Turns out, you can have an amazing astro tourism experience with surprisingly basic gear.
The Absolutely Essential List
1. Tripod
Why: Long exposures (15-30 seconds) require zero camera movement
Our choice: Lightweight carbon fiber for travel
Reality check: Even phone cameras need tripods for night sky shots
2. Camera with Manual Settings
DSLR or mirrorless: Preferred for serious astrophotography
Smartphone: Totally doable with newer models (iPhone 13+ or equivalent)
Key features: Wide aperture (f/1.4-f/4) and good high-ISO performance
3. Red Headlamp
Why red light: Preserves night vision (white light kills your adapted eyesight)
Essential for: Reading star charts, setting up equipment, not tripping over rocks
Budget option: Red filter over regular flashlight
4. Warm Layers
Reality check: Nights get COLD, even in “warm” destinations
Must-haves: Fingerless gloves (for camera operation), warm hat, layered clothing
Pro tip: Desert locations can drop 40°F from day to night
The “Nice to Have” Gear
Star Chart Apps
Stellarium Mobile: Our go-to free option with AR sky overlay
Sky Guide: iPhone favorite with beautiful interface
SkySafari 7 Plus: The serious astronomer’s choice (paid but comprehensive)
Basic Telescope or Binoculars
For beginners: Good binoculars (7×50 or 10×50) are often better than cheap telescopes
If going telescopic: Small refractors are best for travel
Portable Power Bank
Essential for: Long nights of photography and app usage
Travel tip: Lithium batteries must go in carry-on luggage
Advanced Gear (For Future Us)
Equatorial Mount: For serious astrophotography tracking
Dedicated Astronomy Camera: ASI cameras seem popular among pros
Multiple Lenses: Wide-angle for Milky Way, telephoto for details
Step 4: Camera Settings That Actually Work (No, Auto Mode Won't Cut It)
This is where we spent embarrassing amounts of time on YouTube tutorials. Here’s what we learned:
Basic Camera Settings for Beginners
Start With These Settings:
Shutter Speed: 20 seconds (prevents star trails)
Aperture: f/2.8 or widest your lens allows
ISO: 3200 (adjust based on results)
Focus: Manual, set to infinity
File Format: RAW (gives you editing flexibility)
The “500 Rule” for Avoiding Star Trails
Divide 500 by your lens focal length
Example: 500 ÷ 25mm lens = 20 seconds maximum exposure
Crop sensor cameras: multiply focal length by crop factor first
Getting Sharp Focus (The Hardest Part)
Step-by-step process:
Find the brightest star visible
Switch to manual focus
Use live view and zoom in digitally
Adjust focus until the star appears as smallest point
Take test shot and check results
Pro tip: Some lenses have infinity marks, but don’t trust them blindly – temperature changes can affect focus.
Step 5: Accommodation and Logistics (Where to Sleep Under the Stars)
Dark Sky-Friendly Accommodation Options
Specialized Astro Tourism Lodges
Pros: Dark sky-compliant lighting, on-site telescopes, expert guides
Cons: Premium pricing, limited locations
Examples: Botswana salt flats retreats, Portugal glamping domes
National Park Campgrounds
Pros: Often in prime dark sky locations, budget-friendly
Cons: Basic amenities, weather-dependent
Tip: Book early – dark sky campgrounds fill up fast
Dark Sky-Certified Communities
Examples: Flagstaff, Arizona (first Dark Sky City)
Benefits: Entire communities committed to preserving dark skies
Bonus: Local astronomy clubs often host public events
Transportation Considerations
Rental Car Essentials:
GPS backup: Cell service is often spotty in dark sky areas
Emergency kit: First aid, extra water, warm blankets
Fuel planning: Gas stations are rare in remote areas
Step 6: Apps and Planning Tools (Our Digital Star Charts)
Must-Have Apps for Planning
PhotoPills
Cost: ~$20 one-time purchase
Why we love it: Shows exactly where Milky Way will be at any location/time
Essential feature: Augmented reality planning
Stellarium Mobile
Free version: Basic star identification and tracking
Plus version: 1.69 billion star catalog (serious stuff)
Perfect for: Real-time sky identification
Weather Apps with Astronomy Features
Astrospheric: Specialized weather forecasting for astronomers
Clear Outside: Cloud cover predictions
General weather apps: Don’t always account for astronomical needs
Planning Resources
International Dark-Sky Association (IDA) Website
Official dark sky place finder
Lighting guidelines for travelers
Community resources and events
Local Astronomy Clubs
Benefits: Local knowledge, equipment loans, guided sessions
How to find: Search “[your destination] astronomy club”
Step 7: Travel Insurance and Safety (The Boring But Important Stuff)
Adventure Travel Insurance Considerations
Why regular travel insurance might not be enough:
Remote locations: Limited medical access
Equipment coverage: Expensive cameras and telescopes
Activity exclusions: Some policies exclude “adventure activities”
What to look for:
Emergency medical coverage: Especially important in remote areas
Equipment protection: Coverage for photography gear
Trip cancellation: Weather-dependent activities need flexibility
24/7 assistance: Crucial when you’re in the middle of nowhere
Safety Considerations for Dark Sky Travel
Remote Location Safety:
Communication plan: Satellite communicator for true wilderness areas
Local wildlife: Research animals in your chosen destination
Weather monitoring: Sudden storms in open areas can be dangerous
Night Safety Protocols:
Never travel alone: Buddy system for dark sky adventures
Emergency supplies: First aid, extra food/water, emergency shelter
Local knowledge: Check with park rangers or local guides
Step 8: Booking and Final Preparations (Making It Real)
Booking Timeline
6-12 Months Before:
Research destinations and check moon phase calendars
Book accommodations (especially if planning around astronomical events)
Purchase travel insurance
3-6 Months Before:
Confirm weather patterns for your travel dates
Test equipment and practice camera settings
Research local astronomy events or clubs
1 Month Before:
Check weather forecasts and have backup dates
Download offline maps and astronomy apps
Pack and test all equipment
What We Learned About Expectations
Realistic First-Trip Goals:
Primary: Experience truly dark skies for the first time
Secondary: Get a few decent photos to remember the experience
Stretch: Maybe catch a meteor or satellite
Don’t expect: Hubble-quality photos on your first attempt
Common Beginner Mistakes We’re Trying to Avoid:
Overpacking equipment we don’t know how to use
Underestimating cold nighttime temperatures
Planning around full moon dates
Expecting perfect weather on the only clear night
Focusing on photography instead of enjoying the experience
Our Personal Astro Tourism Planning Reality Check
Here’s the honest truth: We started this planning process thinking we’d become amateur astronomers overnight. Reality check – we’re still learning the difference between planets and bright stars half the time. But you know what? That’s totally okay.
What we’re actually aiming for on our first trip:
Experience those goosebump moments when you see the Milky Way with your own eyes
Learn to use our camera well enough to capture memories (not magazine covers)
Not freeze to death while staring at the sky for hours
Come home with stories and probably plans for trip number two
The Bottom Line: Planning Your First Astro Tourism Adventure
Look, we’ll be honest with you – planning our first astro tourism trip has been equal parts exciting and overwhelming. Between moon phases, dark sky classifications, camera settings, and trying to figure out if we actually need that $2,000 telescope, there were moments we wanted to just stay home and watch Carl Sagan documentaries.
But here’s what we’ve learned: the perfect first astro tourism trip isn’t about having perfect equipment or perfect weather or even perfect photos. It’s about taking that first step into a world that’s literally bigger than anything you’ve experienced before.
Our realistic first-timer advice:
Start with an accessible dark sky location (national parks are perfect)
Plan around new moon phases for optimal viewing
Bring warm clothes and a red flashlight
Download a few star apps but don’t stress about mastering them
Focus on the experience first, photography second
Have backup plans because weather happens
Most importantly: Don’t let planning paralysis stop you from booking that trip. The night sky has been waiting billions of years for you to show up – it can handle a few rookie mistakes.
We’re still finalizing our own first astro tourism destination (currently torn between the Canadian Rockies and the Atacama Desert – decisions, decisions), but just the planning process has already changed how we look at the night sky from our urban backyard.
Ready to join us in chasing stars? Trust us, once you start researching dark sky destinations and imagining yourself lying on a blanket under the actual, honest-to-goodness Milky Way, there’s no going back. Your Instagram feed will never be the same.


